The canvas is a powerful tool. It's a 3D visual of your Space from room dimensions to speakers. The canvas accurately displays Object’s physical characteristics and behaviors including motion paths and trigger events . Because it represents every auditory aspect of a Scene there is a preference window that allows you to control how you view the whole Space and the Objects within it.
In This Article:
- Canvas Properties
- Canvas Navigation and View Options
- Timelines
- Connection Status
- Canvas Display Options
Canvas Properties
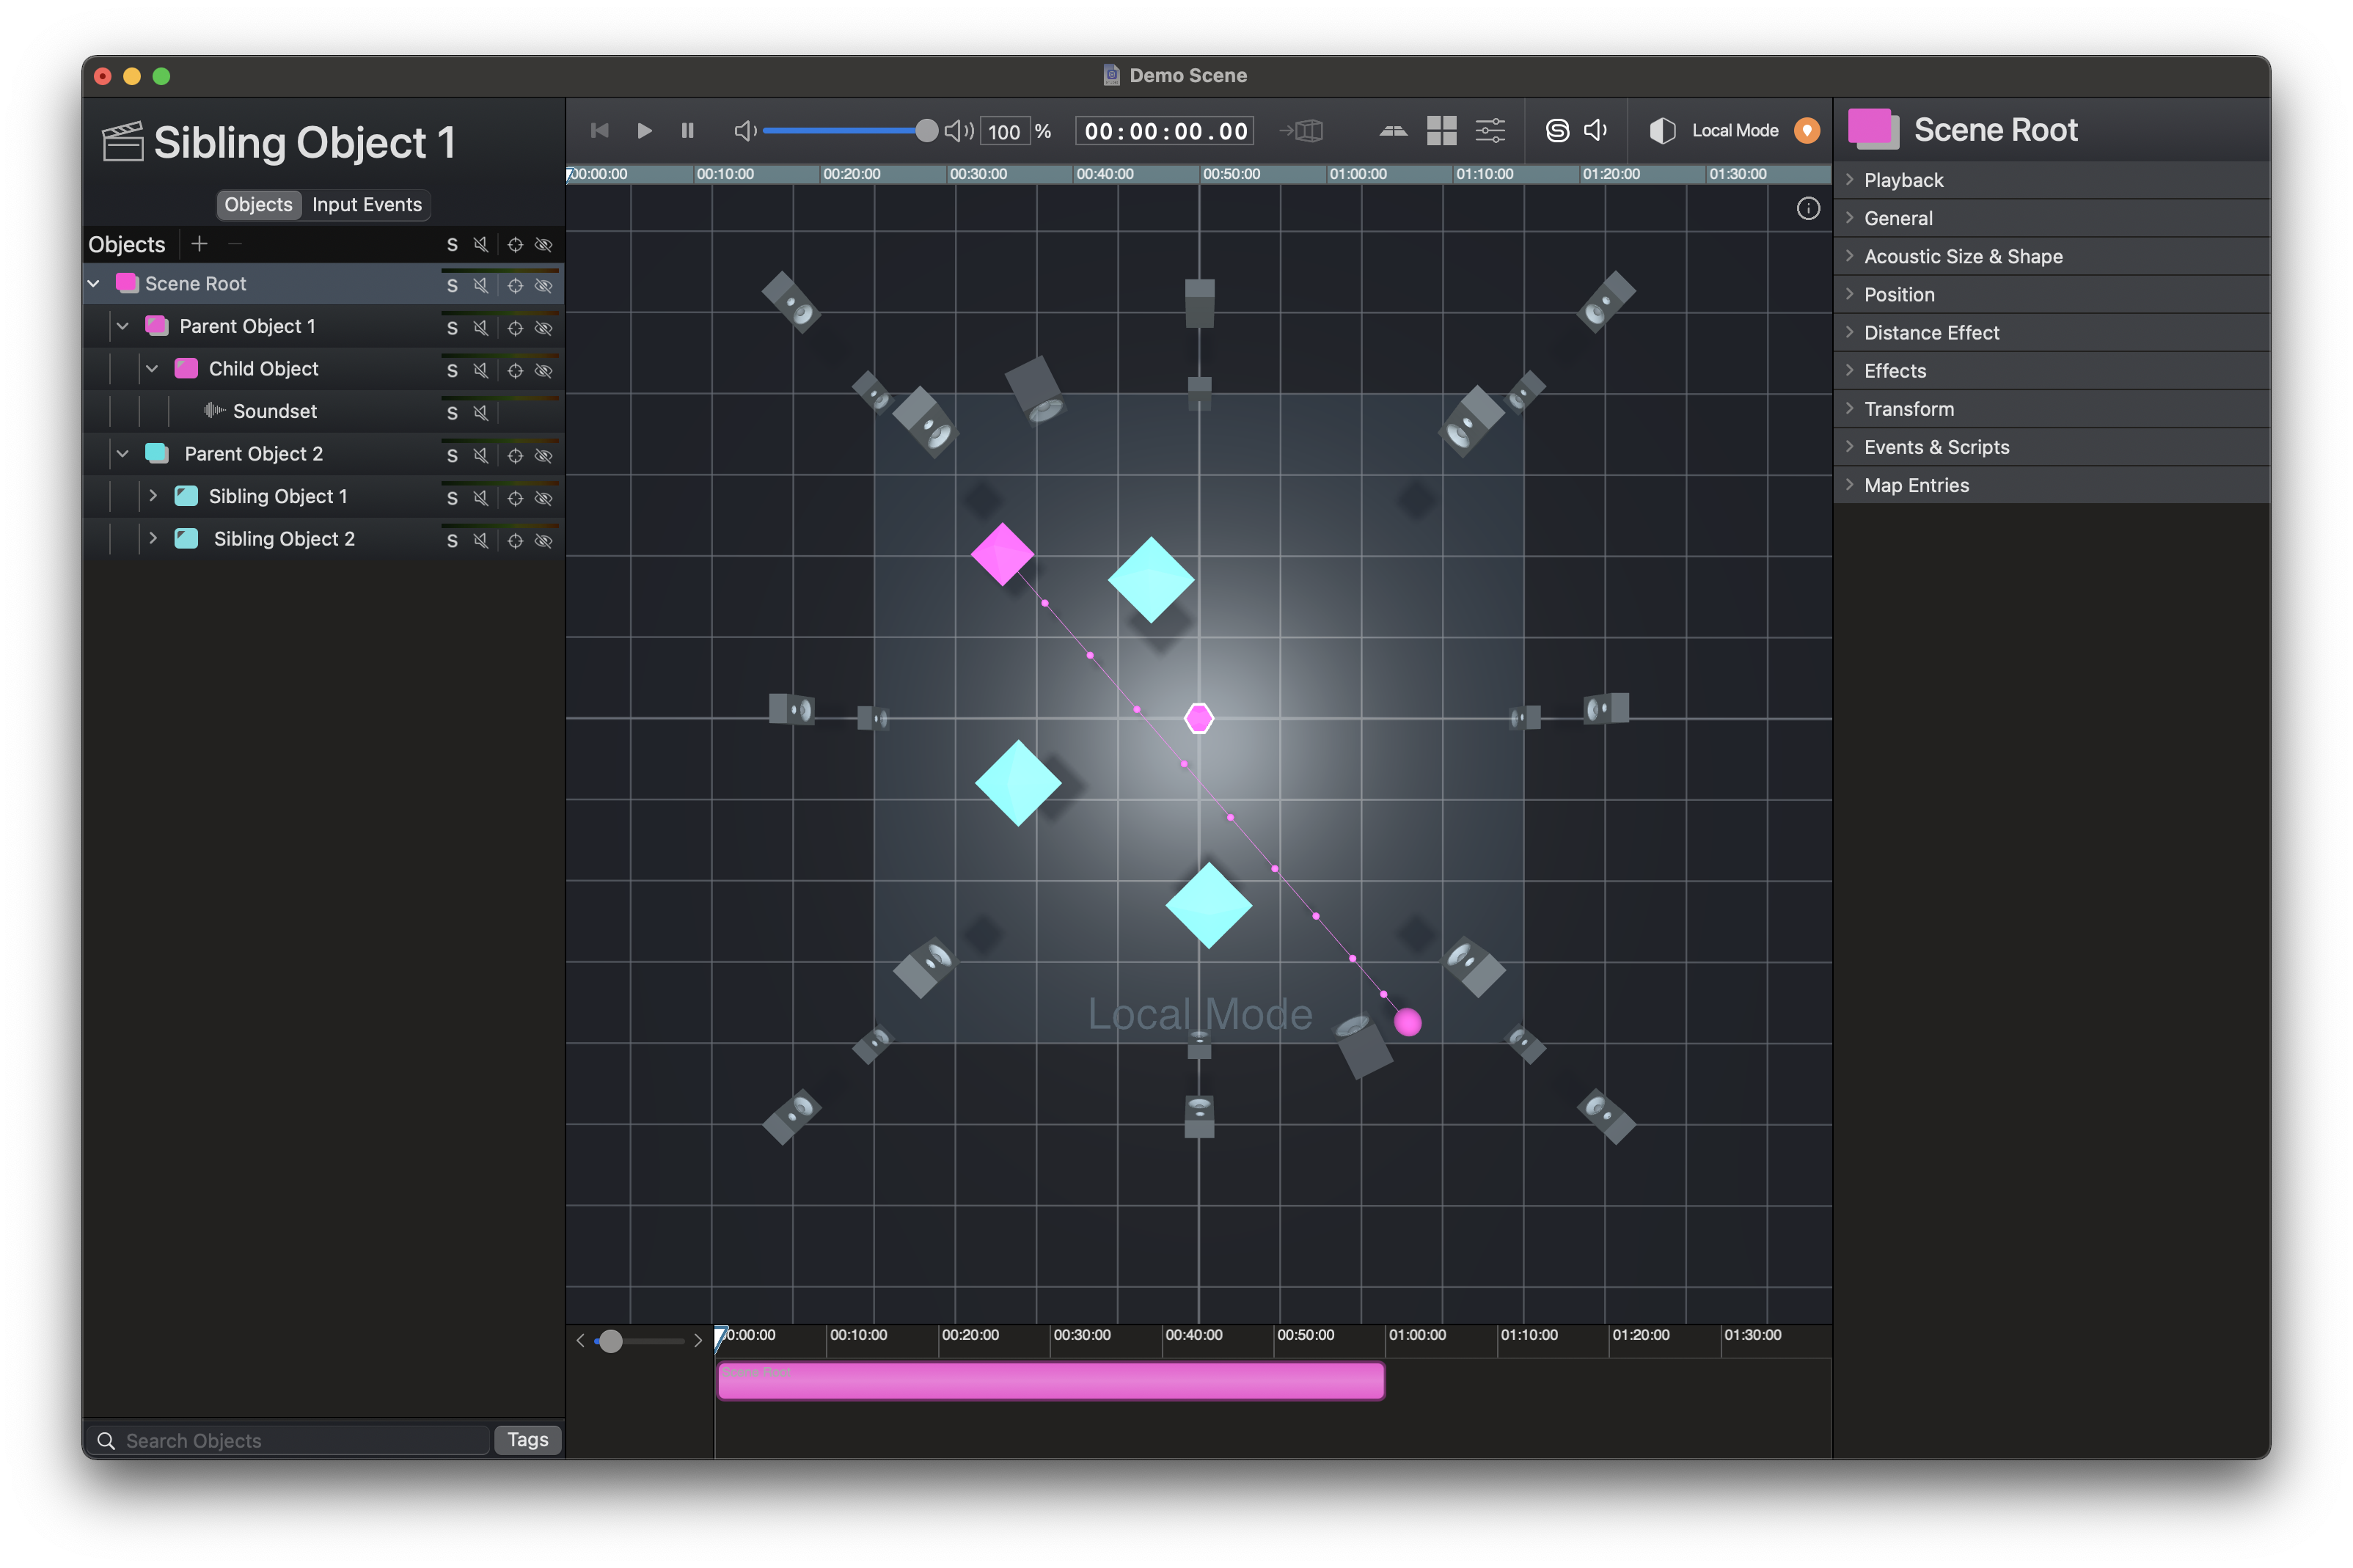
- Scene Root Object: By default, Spatial Studio creates a Scene root Object, which is the highest Object in the hierarchy.
- Space Name: The name of the Space in use is displayed at the floor level at the assumed front of the Space.
- Grid: The canvas is scaled in square meters represented by grid lines displayed at the assumed ground level coordinate of zero.
- Room Boundary: Based on the imported space map, the room boundaries are the borders governed by length, width and height. You can view your room boundary in Spatial Studio > File > Preferences… > Space & Deployment.
- Speakers: The canvas will display speaker locations as they relate to the space map. Clicking a speaker will display ID, channel, type, size and coordinates. Learn more about Space Map Here.
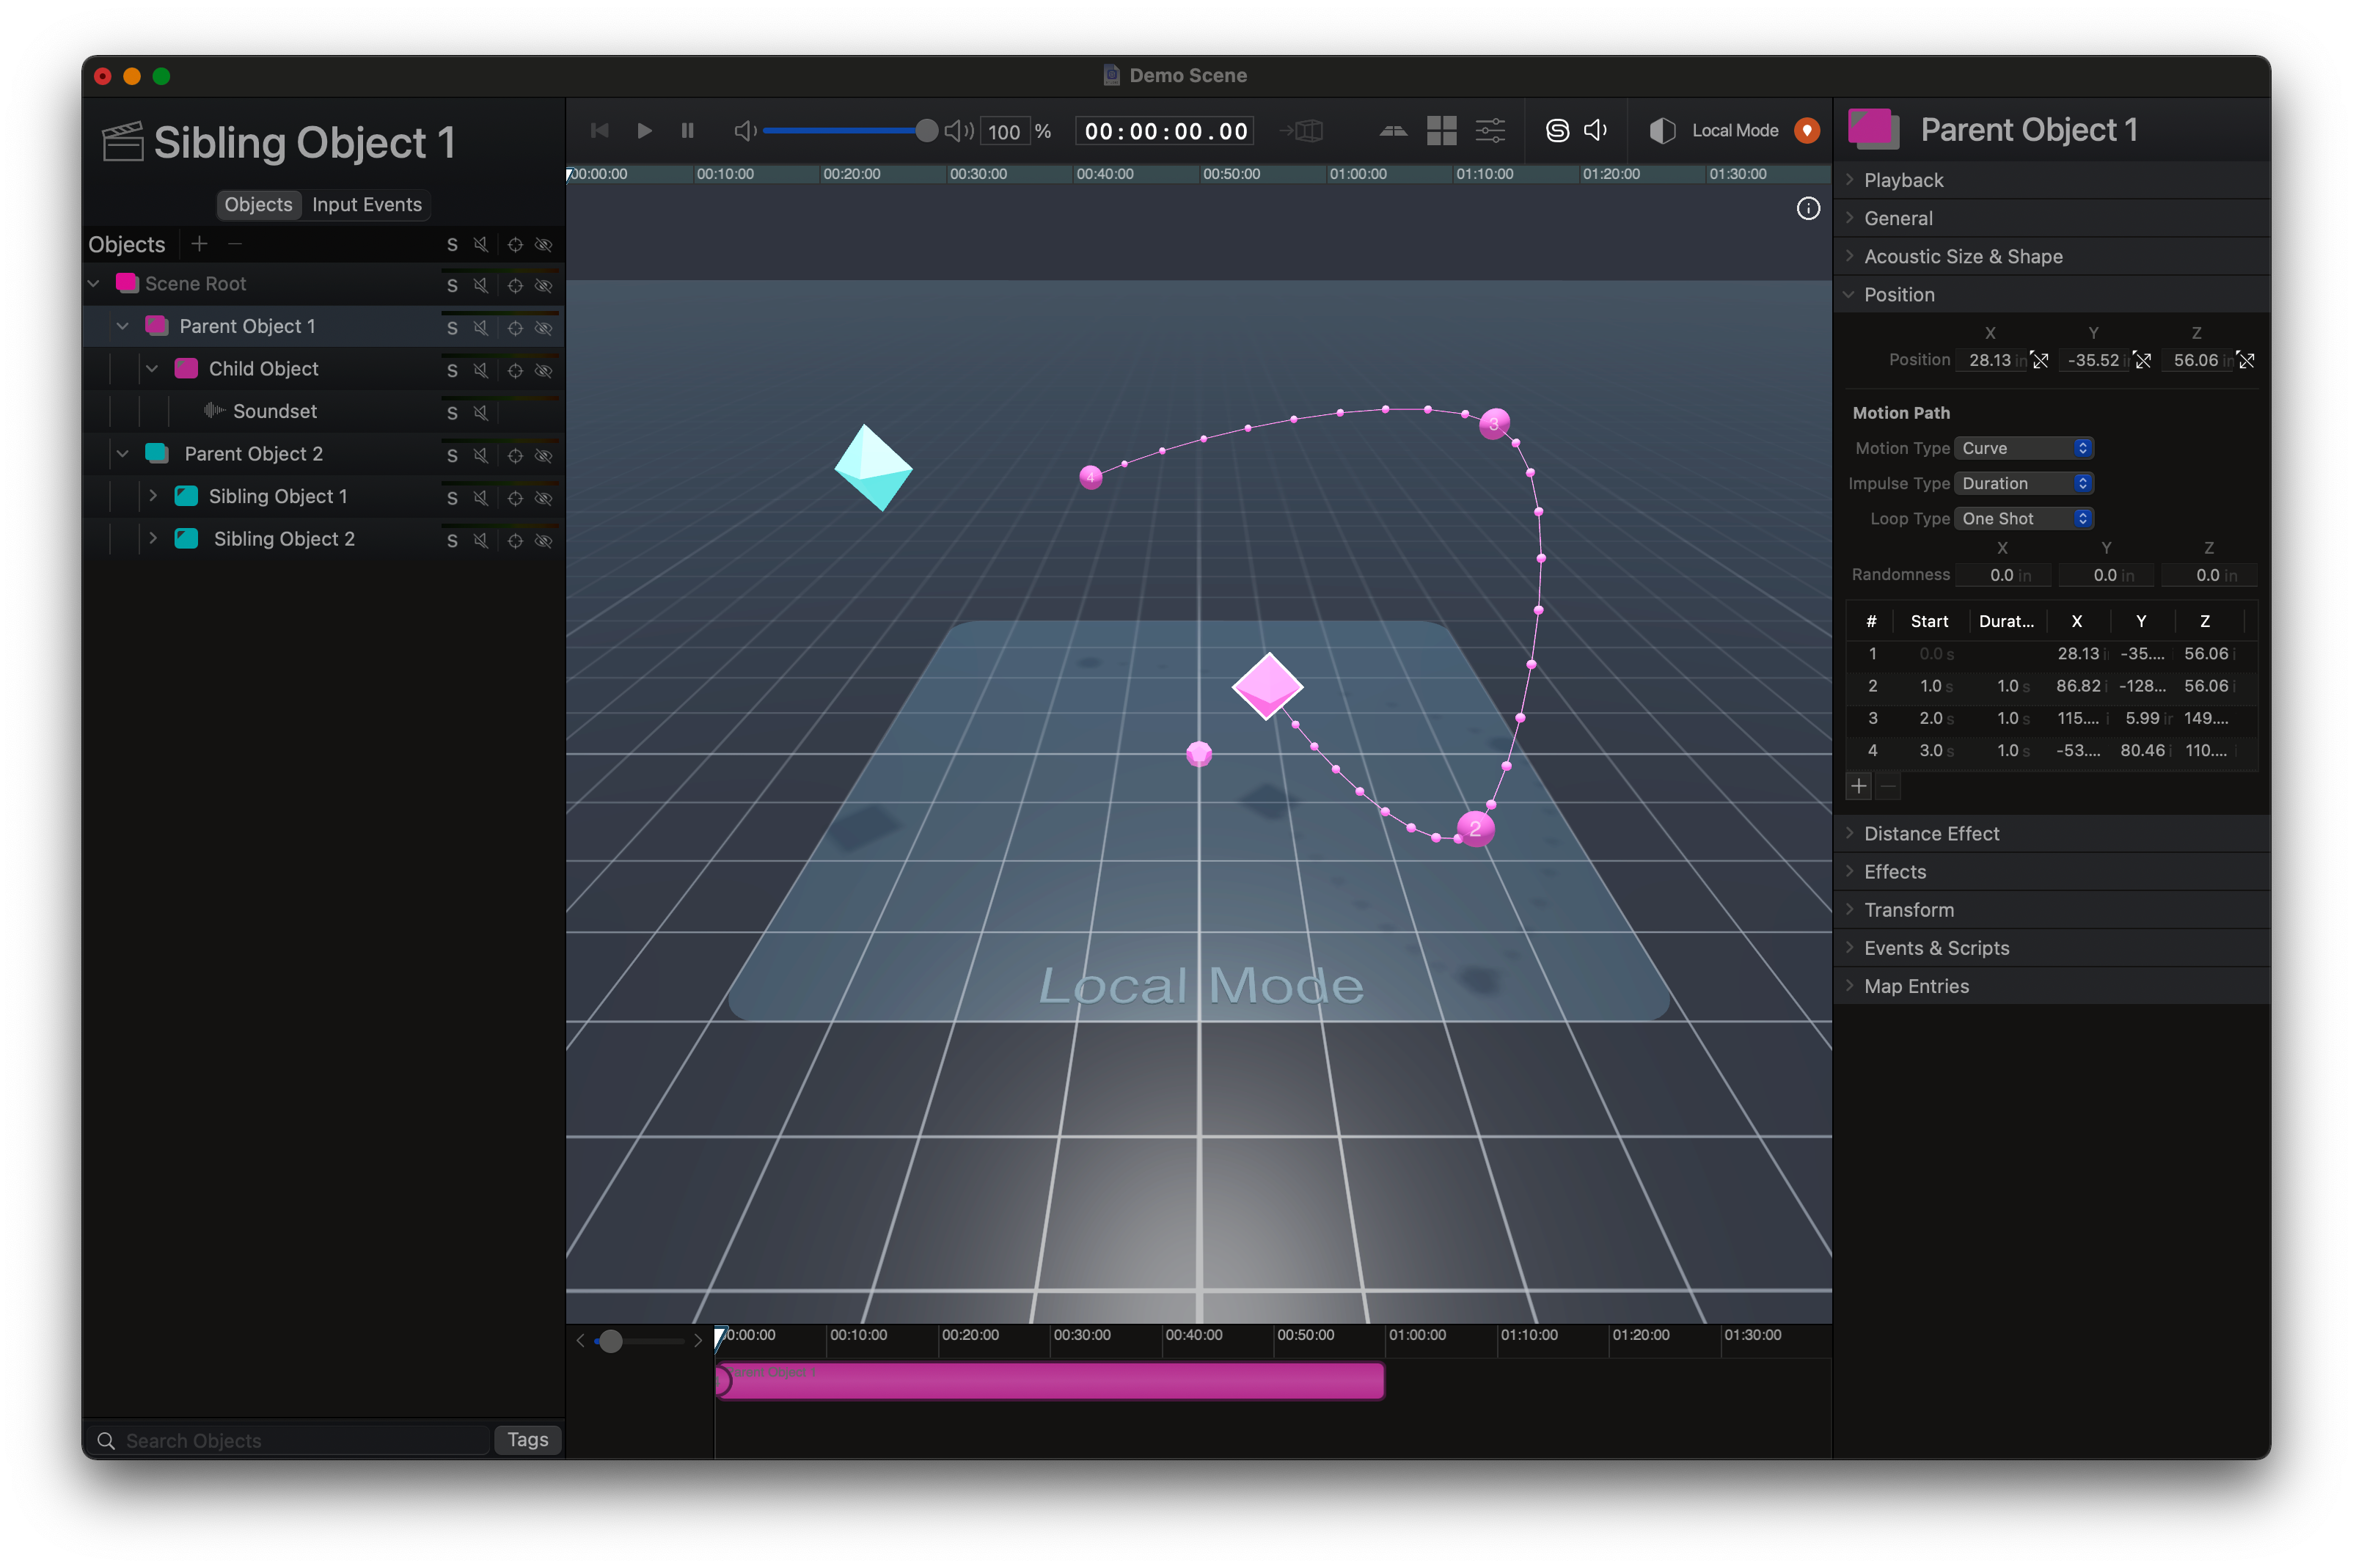
- Canvas Property Window: In the top right corner there is an information panel which can be expanded or collapsed by clicking the i or X icon. When an Object is selected the window displays the Object’s name. To expand the information, click the dropdown arrow. The panel displays Object coordinates, status information such as volume, active or inactive and mute or solo states.
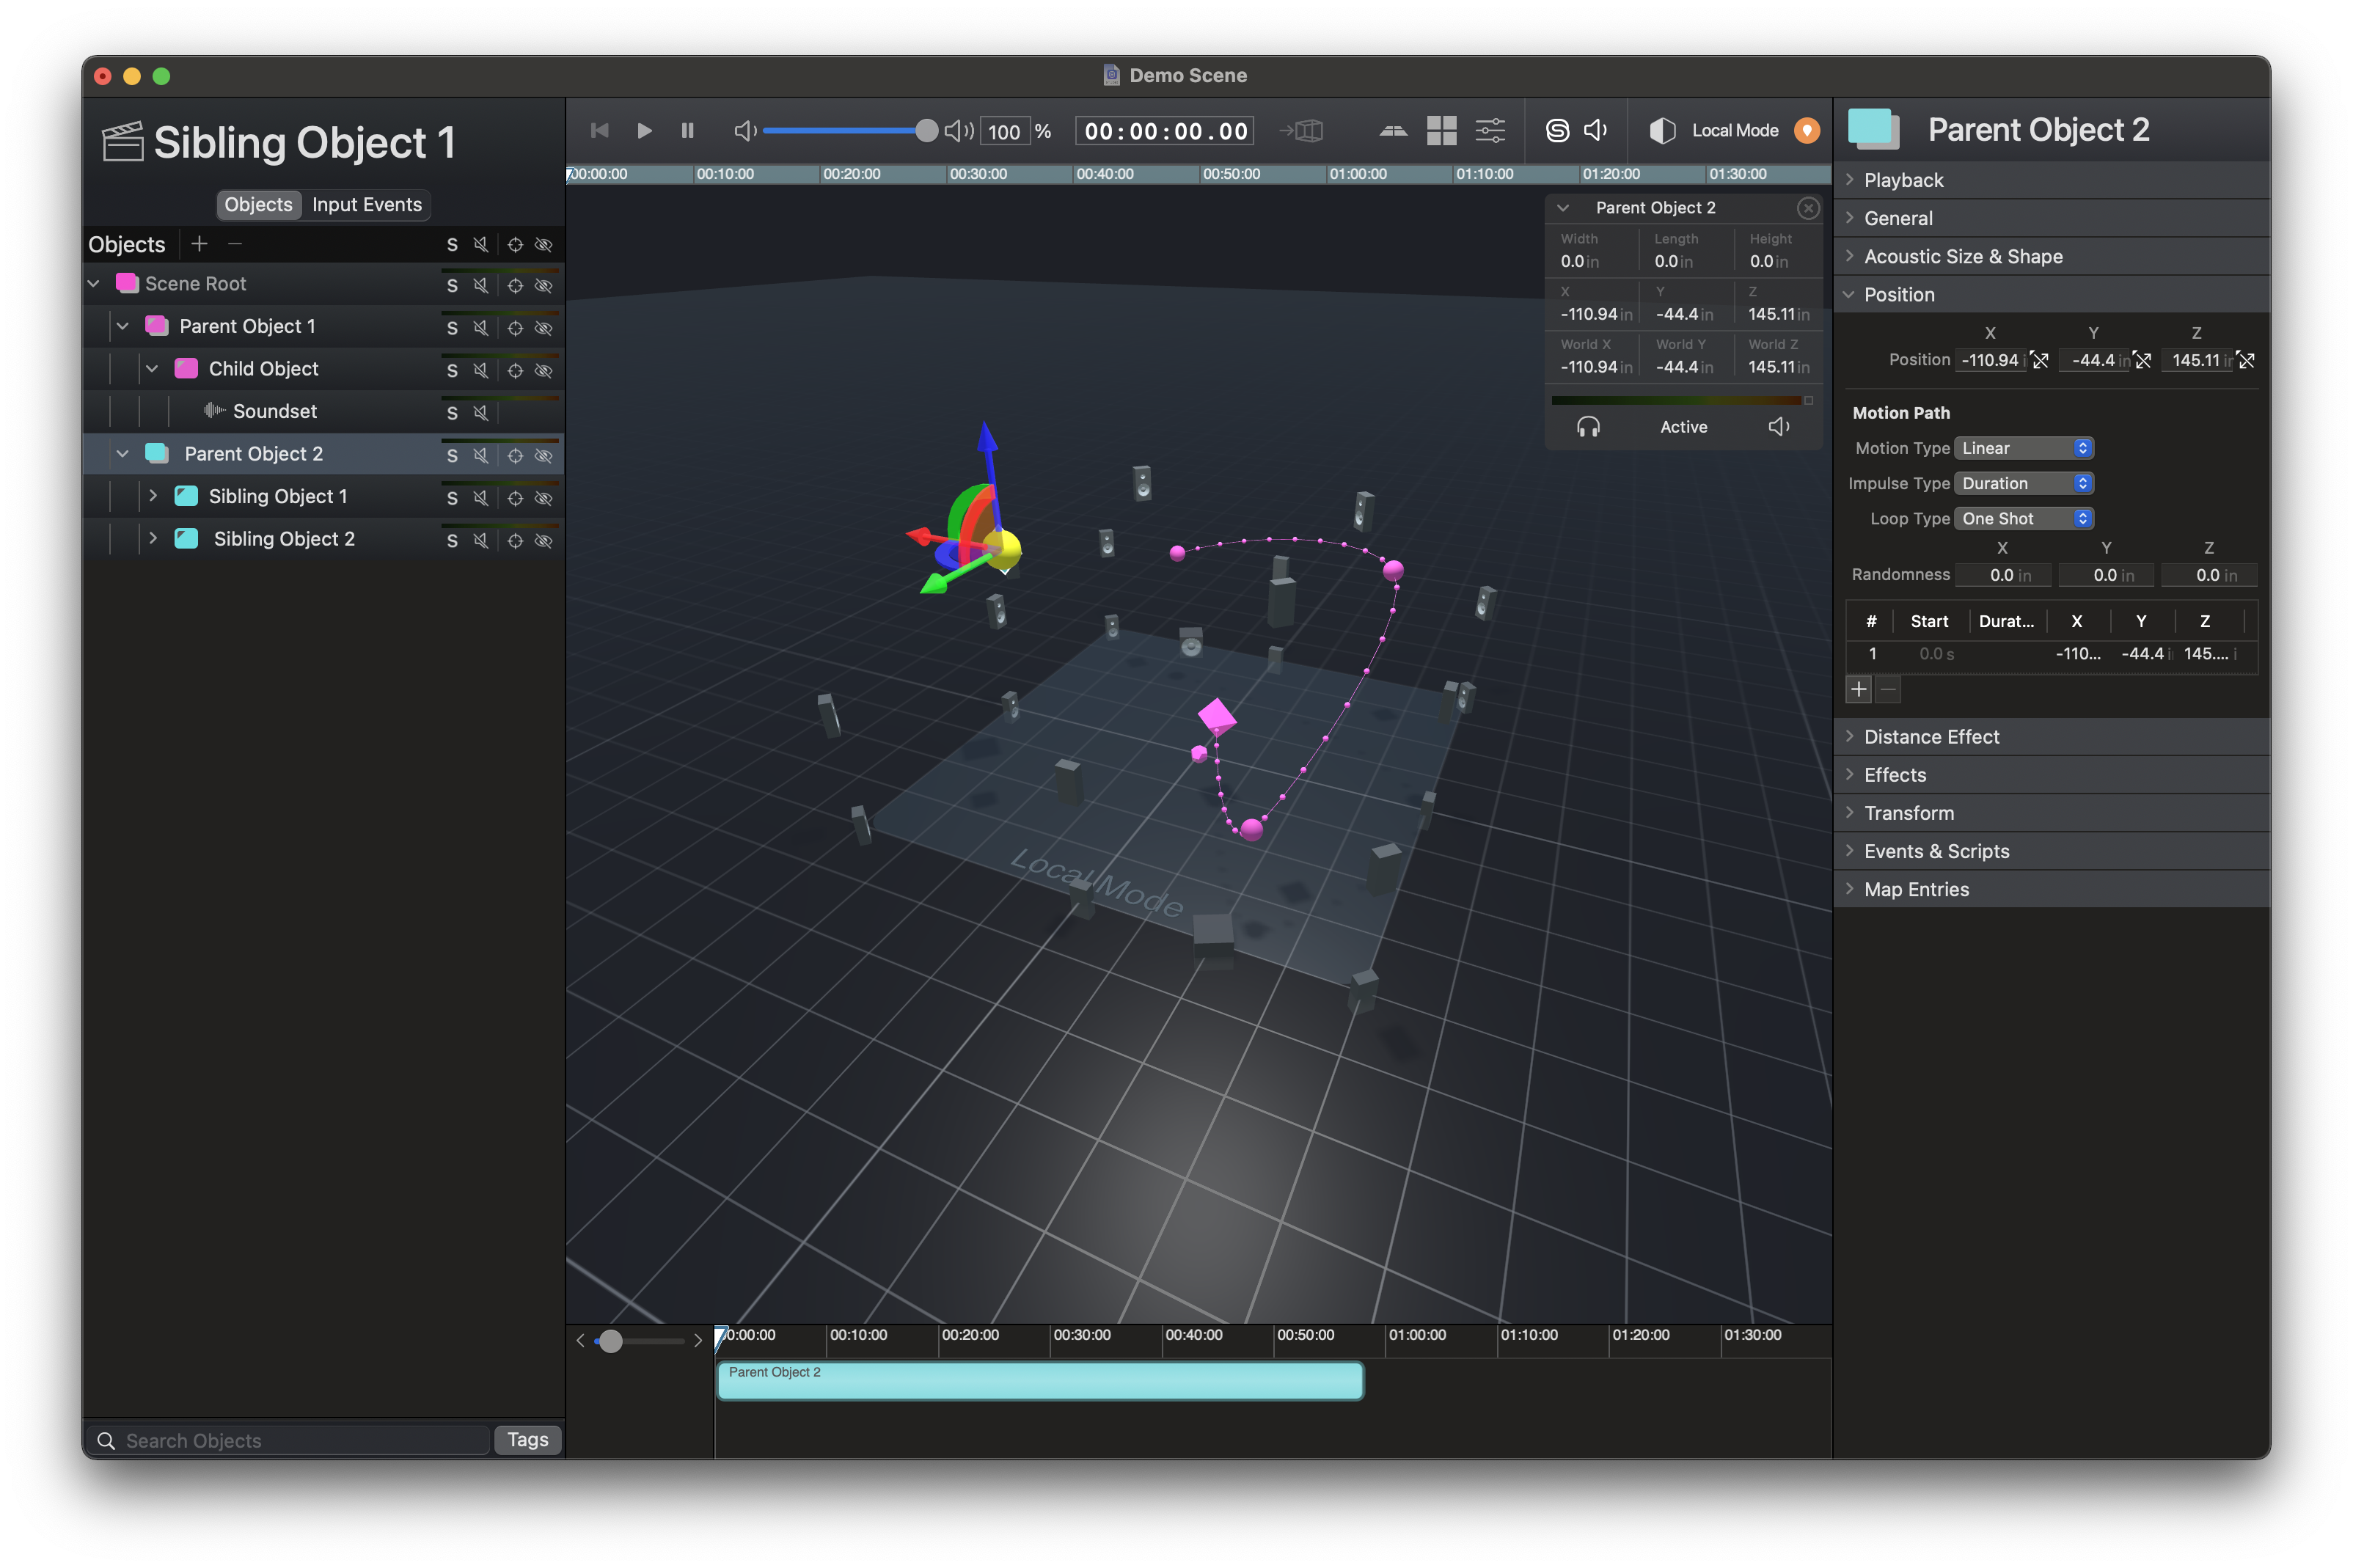
Note: Depending on the Object’s position in the hierarchy and its transform properties, its location in the Space will vary from the set position in the property inspector. In this case, the information panel will display the set position as X,Y,Z coordinates and separately note where it actually exists in the Space as World X, World Y, and World Z.
Canvas Navigation and View Options
There are multiple ways to view the canvas. Spatial Studio has default view settings to help you recenter the canvas or you have the ability to manipulate the angle and view of the canvas with click and drag functionality.
- High Angle Camera: This button brings the canvas into a center view, which is the same as a full reset of the camera view pre-defined angle.
- Top Camera: This brings the canvas to a centered top-down view.
- Cursor Control: You have the ability to manipulate the canvas using your cursor. To control the canvas, right click on the center window or directly on the canvas. While clicking your mouse, drag to reposition the canvas view point. The canvas also responds to the scrolling functions on the mouse as well.
- Capture Canvas Camera Position: [ ⌘ ‘ ] Create a custom canvas view by positioning the canvas in a preferred view and select Capture Canvas Camera Position.
- Set Canvas Camera Position: [ ‘ ] To view your custom camera position, select [ ‘ ] or go to View > Set Camera Canvas Position.
Cursor Control Functions
The following is a list of common canvas navigation functions using a trackpad or magic mouse with two-finger gesture capability.
Note: secondary click must be enabled on your Mac. To configure these settings visit your System Preferences and go to the trackpad or mouse settings.
- Move Canvas Up and Down or Left and Right: Scroll up and down or left and right. This is a two-finger scrolling gesture.
- Camera Tracking: Right click and then drag up and down or left to right. This allows you to re-angle the current view of the canvas. The canvas view will rotate around the origin point of the selected Space.
- Camera tracking: Rotate View around an Object: With an Object selected hold command [⌘] and two-finger click; drag up and down or left to right. If no Object is selected, the canvas view will rotate around the origin point of the Space.
- Zoom In and Out: Click [ ⌥ ] Option to scroll up and down. Using the same gesture, hold down the [ ⌥ ] option key to zoom in and out to change the field of view.
Note: For many users, right click is disabled and replaced with a two-finger click. The functionality remains the same in this instance. It is also common to use the control key as a modifier which enables right click functionality. All tasks in Spatial Studio which require a right-click support control+click, however when navigating the canvas we recommend against it as other modified key commands use the control key already.
Cursor Control Functions cont.
The following is a list of common canvas navigation functions using a mouse with a scroll wheel.
Note: Secondary click must be enabled on your Mac. To configure these settings visit your System Preferences and go to the trackpad or mouse settings.
- Move Canvas Up and Down or Left and Right: Scroll up and down or left and right. If your mouse does not support horizontal scrolling, we recommend using a trackpad or any mouse with horizontal scrolling functionality. Without it, horizontal camera movement will not be possible.
- Camera Tracking: Hold right click and then drag up and down or left to right. This allows you to re-angle the current view of the canvas. The canvas view will rotate around the origin point of the selected Space.
- Camera tracking: Rotate view around an Object: With an Object selected hold command [⌘] and right click; drag up and down or left to right. If no Object is selected, the canvas view will rotate around the origin point of the Space.
- Zoom In and Out: Click [ ⌥ ] Option to scroll up and down.
Timelines
Canvas displays two timelines. One on the top of the canvas and one below. The top timeline displays elapsed time of the Scene, while the timeline below the canvas displays timing information for a selected Object.
Top Timeline | Lower Timeline | Preview Cursor
Top Timeline
The top timeline displays a deterministic loop duration of the Scene. Within the top timeline a blue bar represents the section that is currently displayed in the lower timeline. The blue bar shows the duration within view on the lower timeline. If there are Objects set to infinitely loop, this will only take into account the first iteration.

- Play / Stop: Starts and stops the Scene playback. When play is selected, the Scene will begin to play and the command now becomes a stop function. Clicking stop will reposition the timeline cursor back to the beginning of the Scene and will resume playing from the beginning.
- Pause: Pausing the Scene is a temporary stop. The timeline cursor will remain at its current position.
- Master Volume: Displays and changes the master volume of the connected Space.
- Master Volume by Percent: Input a value from zero to 100 to control the output from the master volume.
- Current Render Time: Displays the current runtime or timer for a Scene. The cursor on the timeline matches the timer display in the control bar. Click the timer to expand the timecode view.
- Manually trigger I/O Event: While a scene is playing, selecting the icon will display a dropdown menu of available manual triggers for input events. If no input events are available in the current scene, this control will be disabled.
- Spatial Headspace - Select to view the Spatial Headspace quick menu.
- Deployment Connection Status: Indicates the connection between the Space and Spatial Studio. The colored circle indicates the status of the deployment; green, yellow and red. Green: connected, yellow: local mode and red: disconnected. Clicking on the indicator will open the Space & Deployment window to manage your Space.
Lower Timeline
The lower timeline displays the length of time the Object will play in relation to the Scene. Selecting a parent Object with a soundset that is 0:03:00 seconds long, double clicking it will display the lower timeline from 00:00:00 to 0:03:00 seconds, and gives a preview of the waveform of that soundset.
Use the slider on the left side of the lower timeline to zoom in or out of the timeline. Moving the slider to the right will zoom into the timeline, meaning if the timeline currently displays 00:10:00, zooming in will focus in on a specific range within :10:00. Sliding left will expand the timeline to full length of the selected Object.

Preview Cursor
The preview cursor is in place at the 00:00:00 marker on the timeline by default. It is notated by a white triangle marker. This is the selected start or stop position of where the Scene or Object will begin playing. The cursor in both timelines display the current play position during playback.
The canvas will update its rendered position of the Objects at that time based on the preview cursor.
You can change the start position by dragging the marker along the timeline while the Scene is stopped. Scrubbing through will show an estimated visual rendering of Objects at the given time.
Note: Uncheck Non-playing Objects in the Canvas Display Options window to scrub through a Scene to view an estimated visual rendering of active playing Objects at a given point in the timeline.
Connection Status
The connection status monitors the connection between the Space (deployment) and Spatial Studio. The colored circle indicates the status of the deployment; green, yellow and red. Green: connected, yellow: local mode and red: disconnected. Clicking on the indicator will open the Space & Deployment window to manage your Space.
Green - Healthy connection between Spatial Studio and the Space.
Orange - Spatial Studio is working in Local Mode or is having trouble connecting to the Space.
Red - Spatial Studio is offline and unable to connect to the Space.
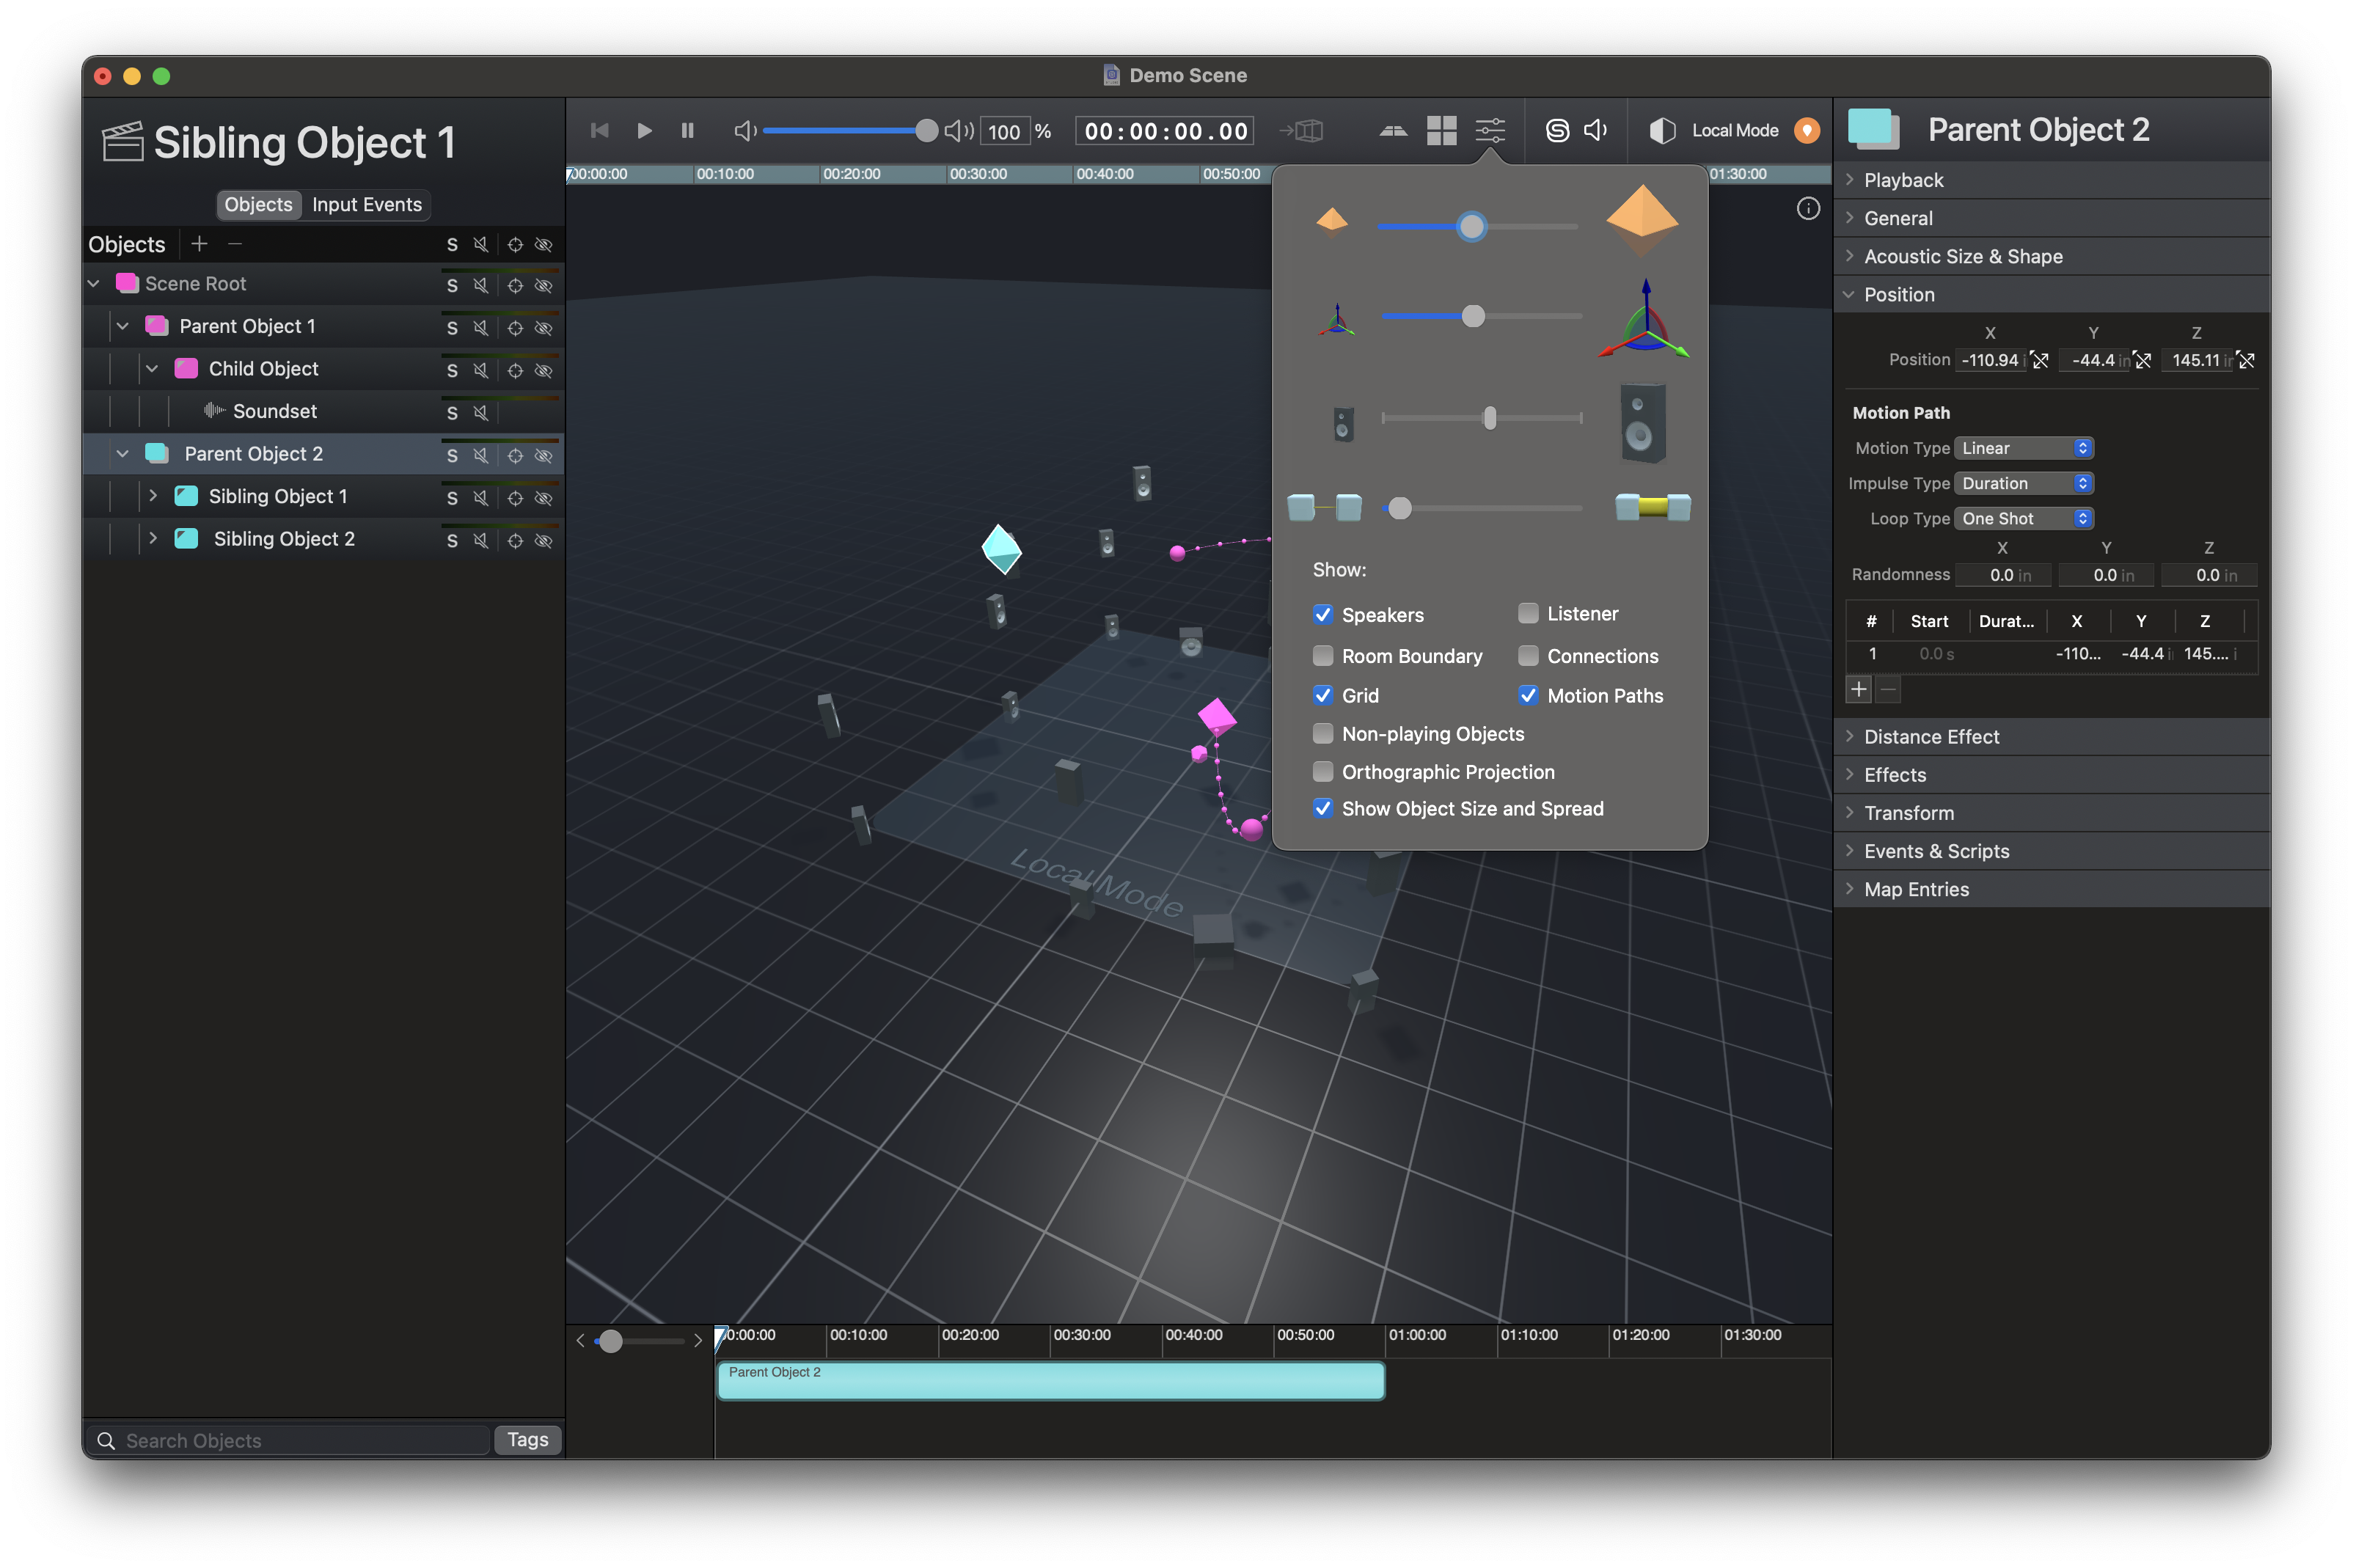
Canvas Display Options
Click the three slider icon to view canvas display options.
| Objects in a Scene |
The first slider adjusts the dimensions of all the Objects in a Scene. This allows Objects to be viewed at a desired scale. It does not affect the sound properties of that Object. This is not to be confused with Object sizing itself, which is a process that enlarges the space a sound Object occupies. If an Object has no size component, this is the size the Object will display in the canvas. |
| Object Manipulation Tool |
The second slider changes the size of the Object manipulation tool. The tool is visible when an Object is selected on the canvas. The size of the Object manipulation tool is independent of the scale and zoom level of the canvas. |
| Speakers | The third slider controls the size of the speakers. |
| Connections | The canvas displays a visible connection between Objects indicating how the hierarchy is connected. Related Objects, such as parents and children, will show a line between them. This slider adjusts the size of the connection line. Sliding right increases, while sliding to the left will decrease the thickness of the line. |
Checkboxes:
| Speakers | Option to display the digital representation of speaker locations in the current Space. |
| Room Boundary | Displays or hides a translucent representation of the size of the connected Space. This changes if the room (Scene) is being rendered in different ways. |
| Grid | Shows the gridlines on the canvas. |
| Non-playing Objects | Checking this box will hide Objects that are not active in the Scene. |
| Orthographic Projection |
Changes the format of canvas display to be an orthographic projection, which is a two dimensional way of representing three dimensions. |
| Origin |
Displays or hides a listener position. This is in the center of the Space by default. |
| Connections |
Display or hide connections. This can toggle the relationship connections in and out of view without changing their visible size setting. |
| Motion Paths |
Show the visual representation of a motion path of an Object(s). |